Why an AI clothes changer is the easiest way to edit outfits
Nano Banana 2 is a flexible AI image-editing model that can also handle clothing changes when you upload a person photo, add a garment reference, and guide the result with a prompt.
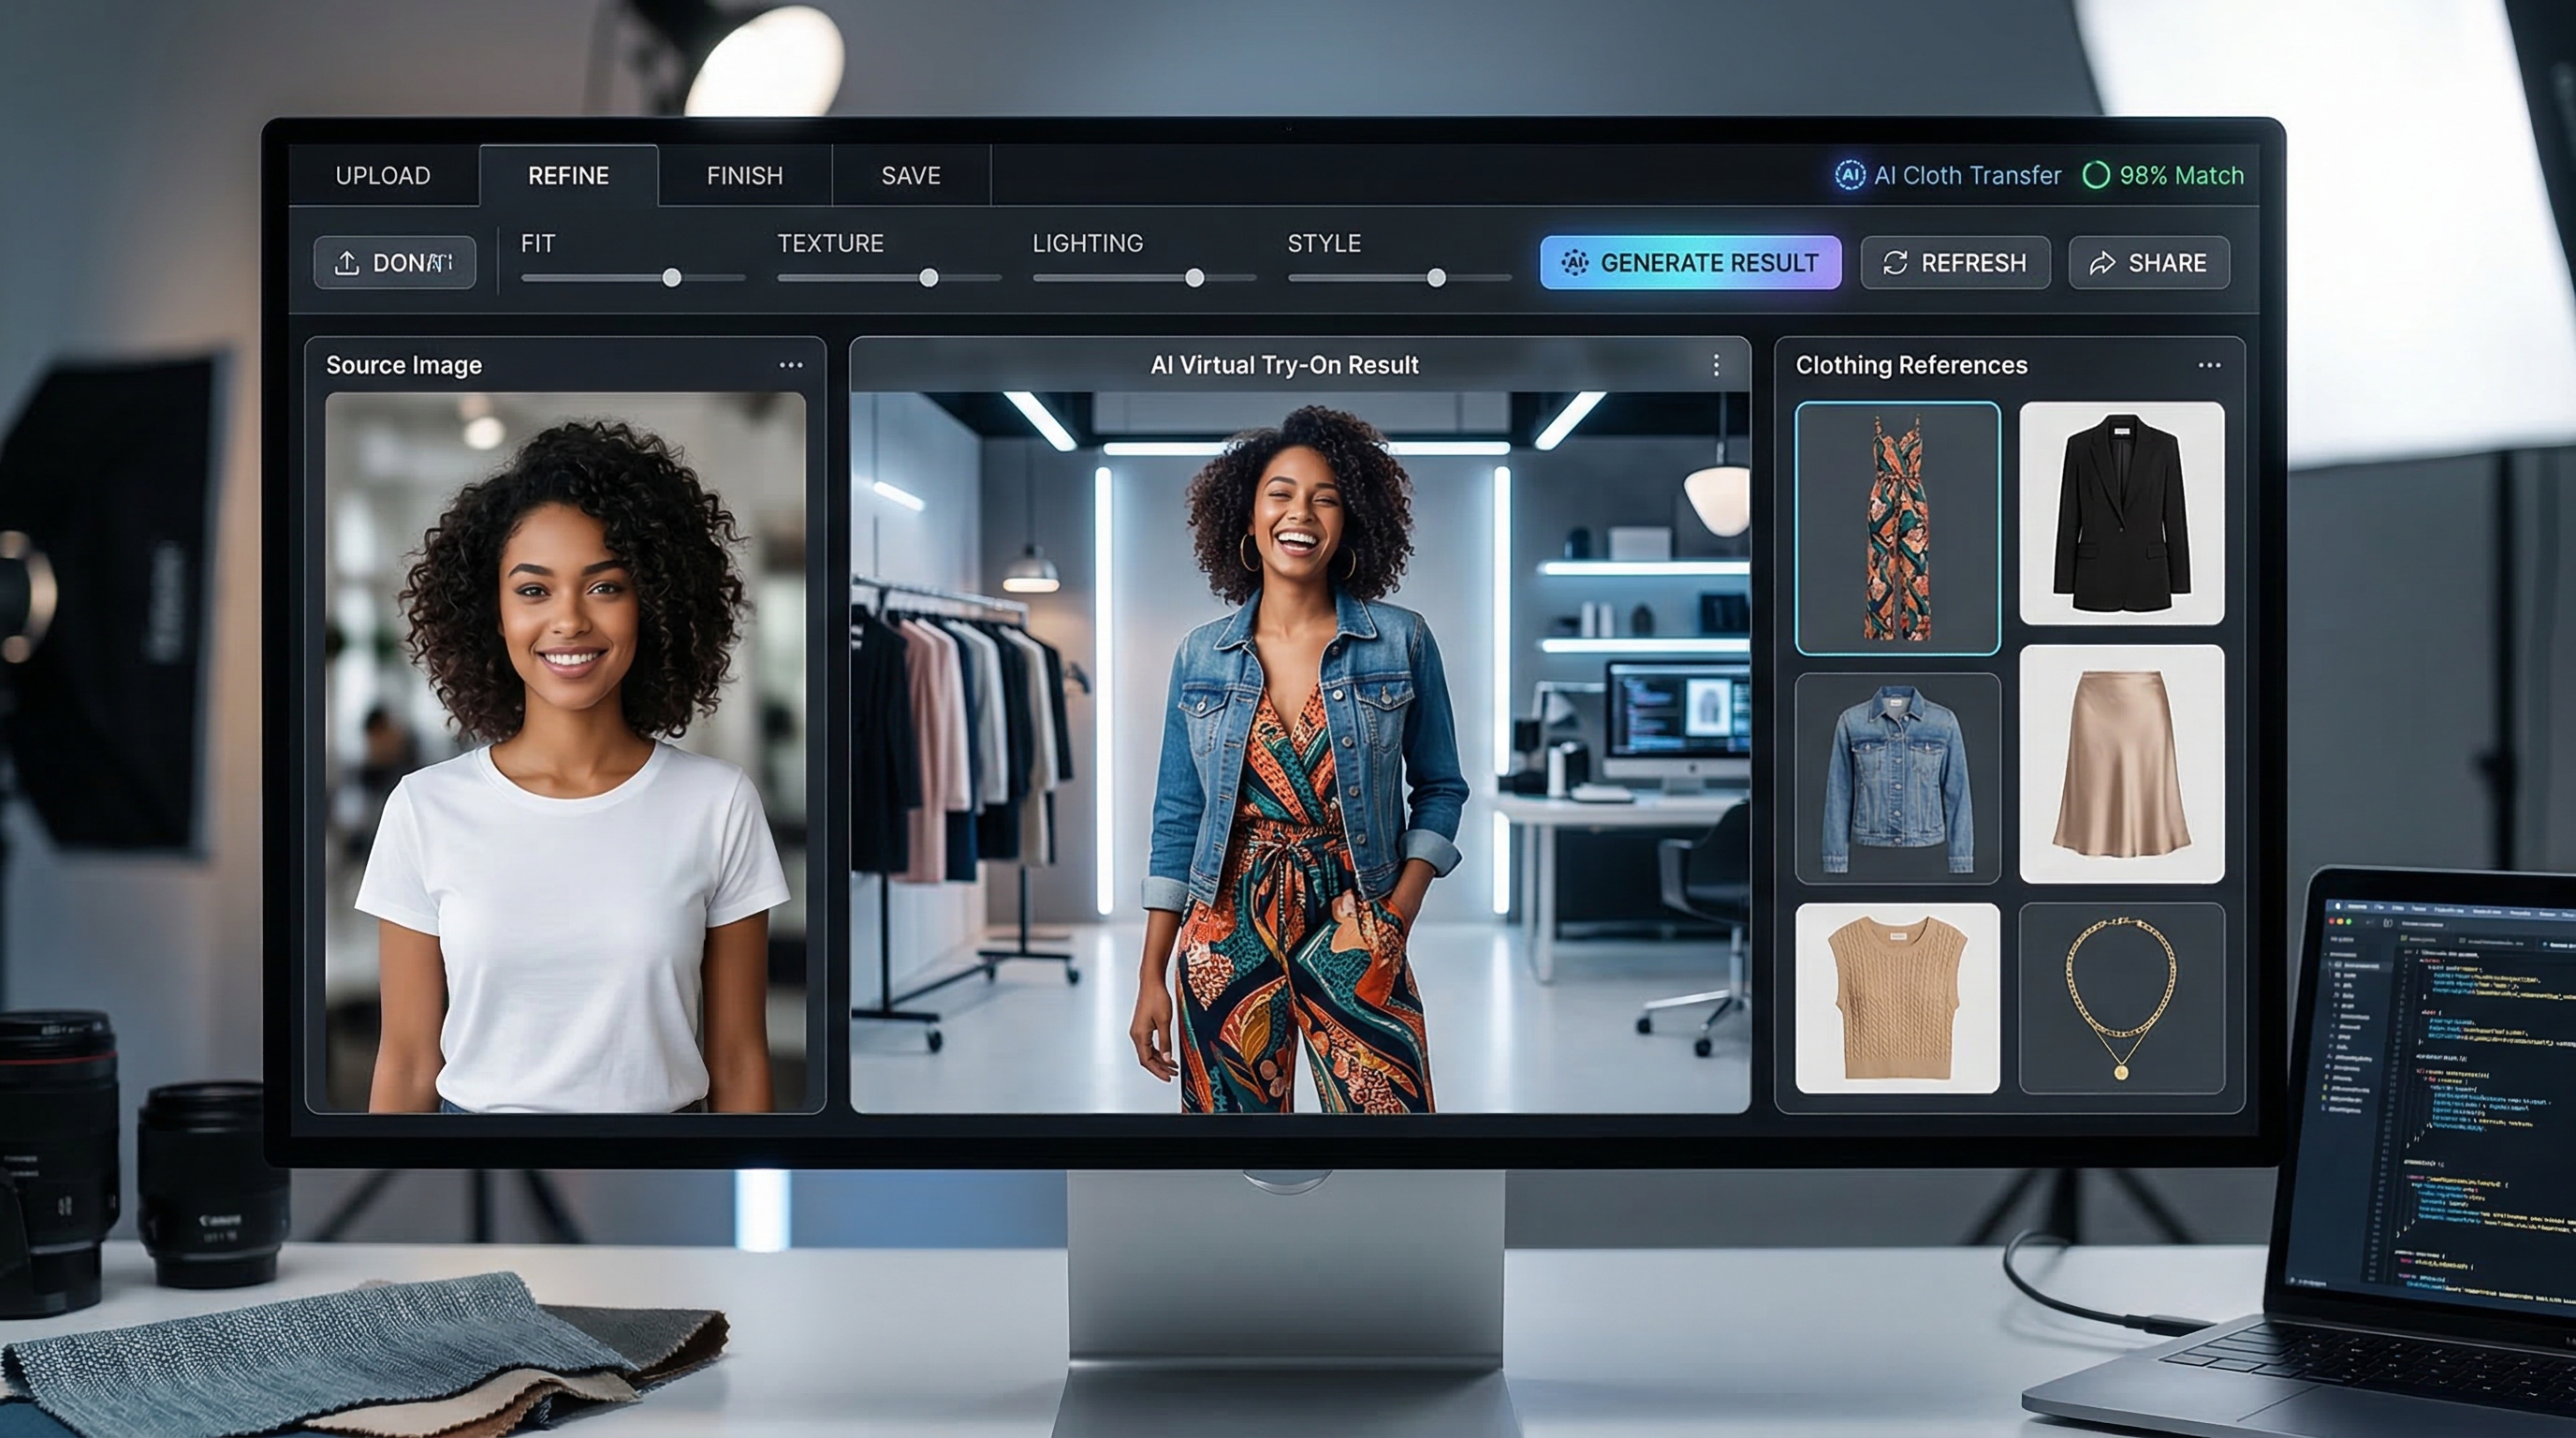
But for most users, a dedicated AI clothes changer is the better choice. Flux Pro AI’s online AI clothes changer is built specifically for virtual try-on, so it is faster, simpler, and easier to use. Just upload the person image, upload the clothing image, choose single or multiple garments, and generate the new look.
What you need before changing clothes in a photo
Before starting, prepare two kinds of images.
First, you need a clean photo of the person. A clear front-facing or three-quarter portrait usually works best. Good lighting helps the model understand the body shape, pose, and clothing boundaries.
Second, you need one or more garment images. These can be product photos, flat-lay clothing images, or outfit references. Cleaner garment photos usually produce cleaner results because the system can identify sleeve length, texture, silhouette, and color more accurately.
If your goal is realism, keep the source materials simple. Use a person photo with visible clothing contours and garment references with minimal clutter. If your goal is more creative, you can be looser with the input and refine the look later with Google’s Nano Banana 2.
Why Flux Pro AI’s dedicated clothes-changing tool should come first
If your main goal is to replace clothing rather than redesign the whole image, a dedicated AI clothes changer online workflow is the better choice.
The biggest advantage is clarity. Instead of combining image upload, prompt writing, and manual editing in one place, the tool separates the process into practical steps. You upload the person image, upload the clothing image, choose your garment mode, and generate. That structure makes it much easier for beginners, online sellers, fashion creators, and casual users.
It is also more efficient for repeated experiments. If you want to test the same person photo with multiple tops, dresses, jackets, or full outfits, a dedicated photo clothes changer tool saves time and reduces prompt-writing friction.
That is why an article focused on outfit replacement should lead with this tool rather than with a general image model.
How to use the AI clothes changer on Flux Pro AI
1. Open the tool
Go to the AI clothes changer page and choose a model.
2. Upload the person photo
Add the image of the person you want to edit. This will be the base photo.
3. Upload the clothing image
Add the garment reference, then choose Single Garment for one item or Multiple Garments for a full look.
4. Use templates if needed
Try the person or clothing templates if you want a quick test before uploading your own images.
5. Click Generate
Create the result and check how well the new outfit fits the person.
6. Regenerate for better results
If the fit looks off or the clothing details are unclear, try again with a cleaner garment image.
For the best results, use a clear person photo, a garment image with visible shape and texture, and a simple styling goal.
When to use Nano Banana 2 instead
A dedicated tool is the easiest option, but it is not the only one. Nano Banana 2 on Google Gemini is useful when you want more manual control over the final image.
For example, you may want to keep the outfit swap realistic while also changing the mood, camera style, or image polish. You may want the model to preserve the person exactly while applying the garment in a more editorial or cinematic way. You may even want to combine outfit replacement with higher-end prompt-based enhancements.
That is where Google Nano Banana 2 becomes useful. You can upload the source image, add a prompt, and tell the model exactly what to preserve and exactly what to change.
Some users may also know this editing approach through the phrase Gemini 3.1 Flash for image editing, especially when discussing Google-style fast image editing workflows. In this article’s context, the important idea is not the label itself but the use case: a prompt-guided image model gives you more flexibility than a one-purpose try-on interface.
How to change clothes with Nano Banana 2
To change clothes with Nano Banana 2, upload the person image first. Then add the clothing reference image. Write a prompt that tells the model to preserve the face, hairstyle, pose, body proportions, camera angle, and lighting. After that, specify that only the clothing should change.
The more precise the prompt, the better the result usually becomes. If the first output is close but not perfect, regenerate with clearer wording. Often, one pass improves the general outfit shape, while a second pass improves texture, folds, fit, or silhouette.
This manual workflow is especially useful for creators who want more than a simple swap. If you want a campaign-style look, a fashion mockup, or a polished social visual, Gemini Nano Banana 2 gives you more space to refine the result.
Three ready-to-use prompt templates
Here are three prompt templates you can use when editing outfits with Nano Banana.
1. Realistic single-garment swap
Replace the person’s current clothing with the uploaded garment reference. Keep the same face, hairstyle, pose, body proportions, camera angle, background, and lighting. Make the new clothing fit naturally and realistically, with accurate fabric folds, seams, shadows, and texture. Do not change the person’s identity or the environment.
2. Full look replacement
Use the uploaded person photo as the base image and the uploaded clothing images as wardrobe references. Change the outfit to match the reference garments while preserving the face, skin tone, posture, framing, and scene composition. Keep the result photorealistic and balanced. Avoid distorted hands, warped fabric, extra accessories, or body-shape changes.
3. E-commerce fashion try-on
Transform this portrait into a clean fashion try-on image using the uploaded garment reference. Keep the model’s identity, pose, and proportions consistent. Apply the clothing accurately with realistic stitching, natural drape, and proper fit. Use neat product-photo realism, even lighting, sharp garment edges, and a polished commercial finish.
Prompt tips that improve outfit edits
Whether you use a general model or a dedicated AI clothes-changing tool workflow, the same principles help.
State what must stay the same before you describe what should change. In most cases, that means the face, hair, pose, body shape, framing, background, and lighting should be preserved. Then describe the new clothing clearly.
Use realism words when realism matters. Terms like natural fit, realistic fabric folds, visible seams, accurate texture, and balanced shadows help guide the model toward believable output.
Also describe what should not happen. Ask the system not to alter identity, body shape, accessories, or the background unless necessary. This reduces the chance of unwanted changes.
Common problems and how to fix them
The first common issue is weak garment matching. If the final outfit only loosely resembles the reference, use a cleaner garment image with less clutter and clearer shape.
The second issue is identity drift. If the face, hair, or body shape changes too much, strengthen the preservation instructions in your prompt or return to the dedicated photo clothes changer interface for a more direct workflow.
The third issue is unnatural fabric. If the clothing looks painted on, ask for realistic folds, drape, stitching, and shadows. These details often improve realism.
The fourth issue is overcomplication. If you upload too many garment references at once, the system may blend them awkwardly. Start with a simpler clothing combination, then build up.
Best use cases for AI clothing swaps
An AI clothes changer online workflow is especially useful for virtual try-on, fashion previews, social content, e-commerce drafts, and styling experiments.
For fashion sellers, it can help preview how a garment might look on a human subject. For content creators, it can speed up look testing and visual storytelling. For casual users, it is a fun and practical way to explore new styles before buying or photographing real outfits.
Meanwhile, Google Nano Banana 2 is better suited to creative edits that go beyond clothing replacement and move into broader visual enhancement.
Final recommendation
If your goal is simple and direct outfit replacement, start with Flux Pro AI’s AI clothes changer. It is the cleaner, easier, and more practical route for most users.
If you want more advanced prompt control, stylized results, or a broader image-editing workflow, use Nano Banana 2 alongside it.
In other words, the dedicated try-on tool should be your first stop, while Gemini Nano Banana 2 works best as the creative follow-up tool for refinement and experimentation.
Related Article for the in-site
- AI Clothes Changer with Flux Pro AI: The Future of Virtual Fashion Try-On
- Nano Banana 2 vs Nano Banana Pro: Which AI Image Model Should You Use?
- 10 Best Prompt Ideas for Nano Banana Pro: A Complete AI Image Prompt Guide
- Seedream 5.0 Lite vs Nano Banana Pro on FluxProWeb: A Practical Comparison Guide