If you’ve ever generated a great-looking character image and then hit the wall—“Okay, but how do I make them move the same way every time?”—you’re exactly the person motion control was built for.
Text prompts alone can produce decent video… but they’re not great at repeatability. One run gives you a smooth walk; the next run gives you a different walk, a different face, and sometimes a different person. Motion control fixes that by letting you borrow motion from a real reference clip and apply it to your character.
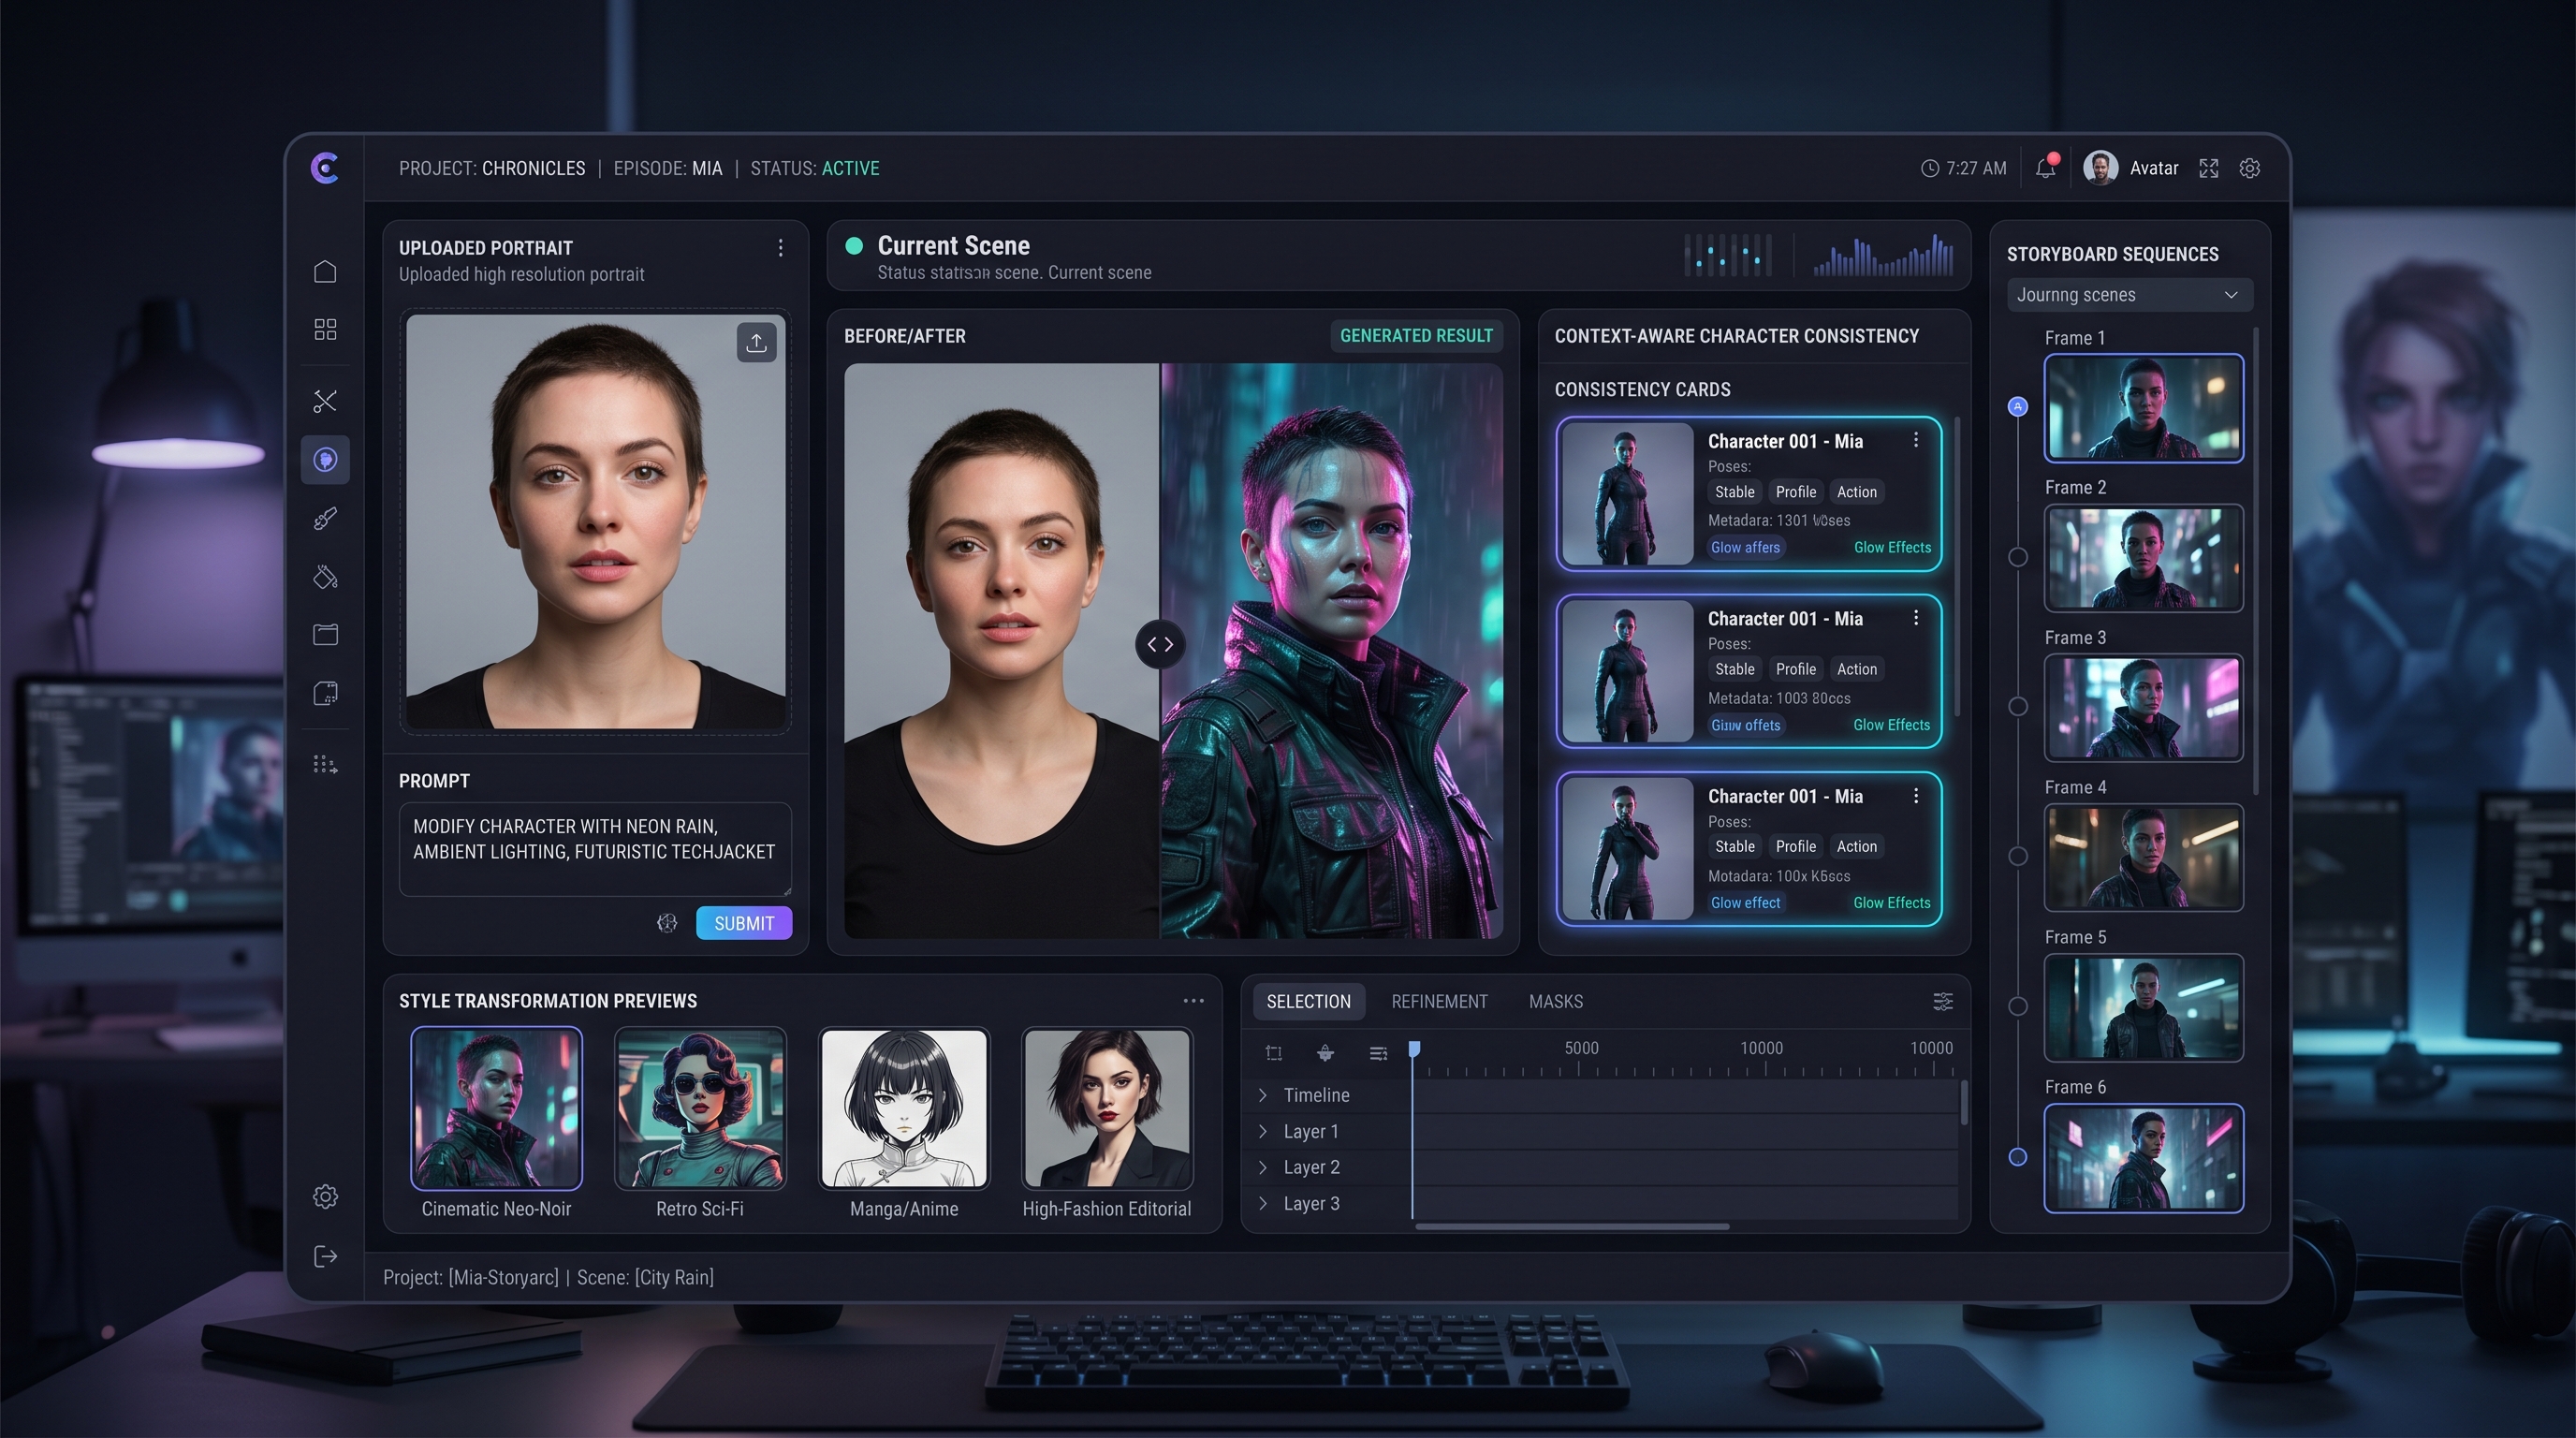
In this guide, we’ll walk through a creator-friendly workflow using Kling 2.6 to make character motion, and I’ll explain why kling 2.6 motion control is the better pick for motion control (vs. higgsfield motion control) when your main goal is clean motion transfer and consistent identity. Then we’ll wrap by showing why running this workflow on Flux Pro AI makes the whole process simpler.
What motion control actually does?
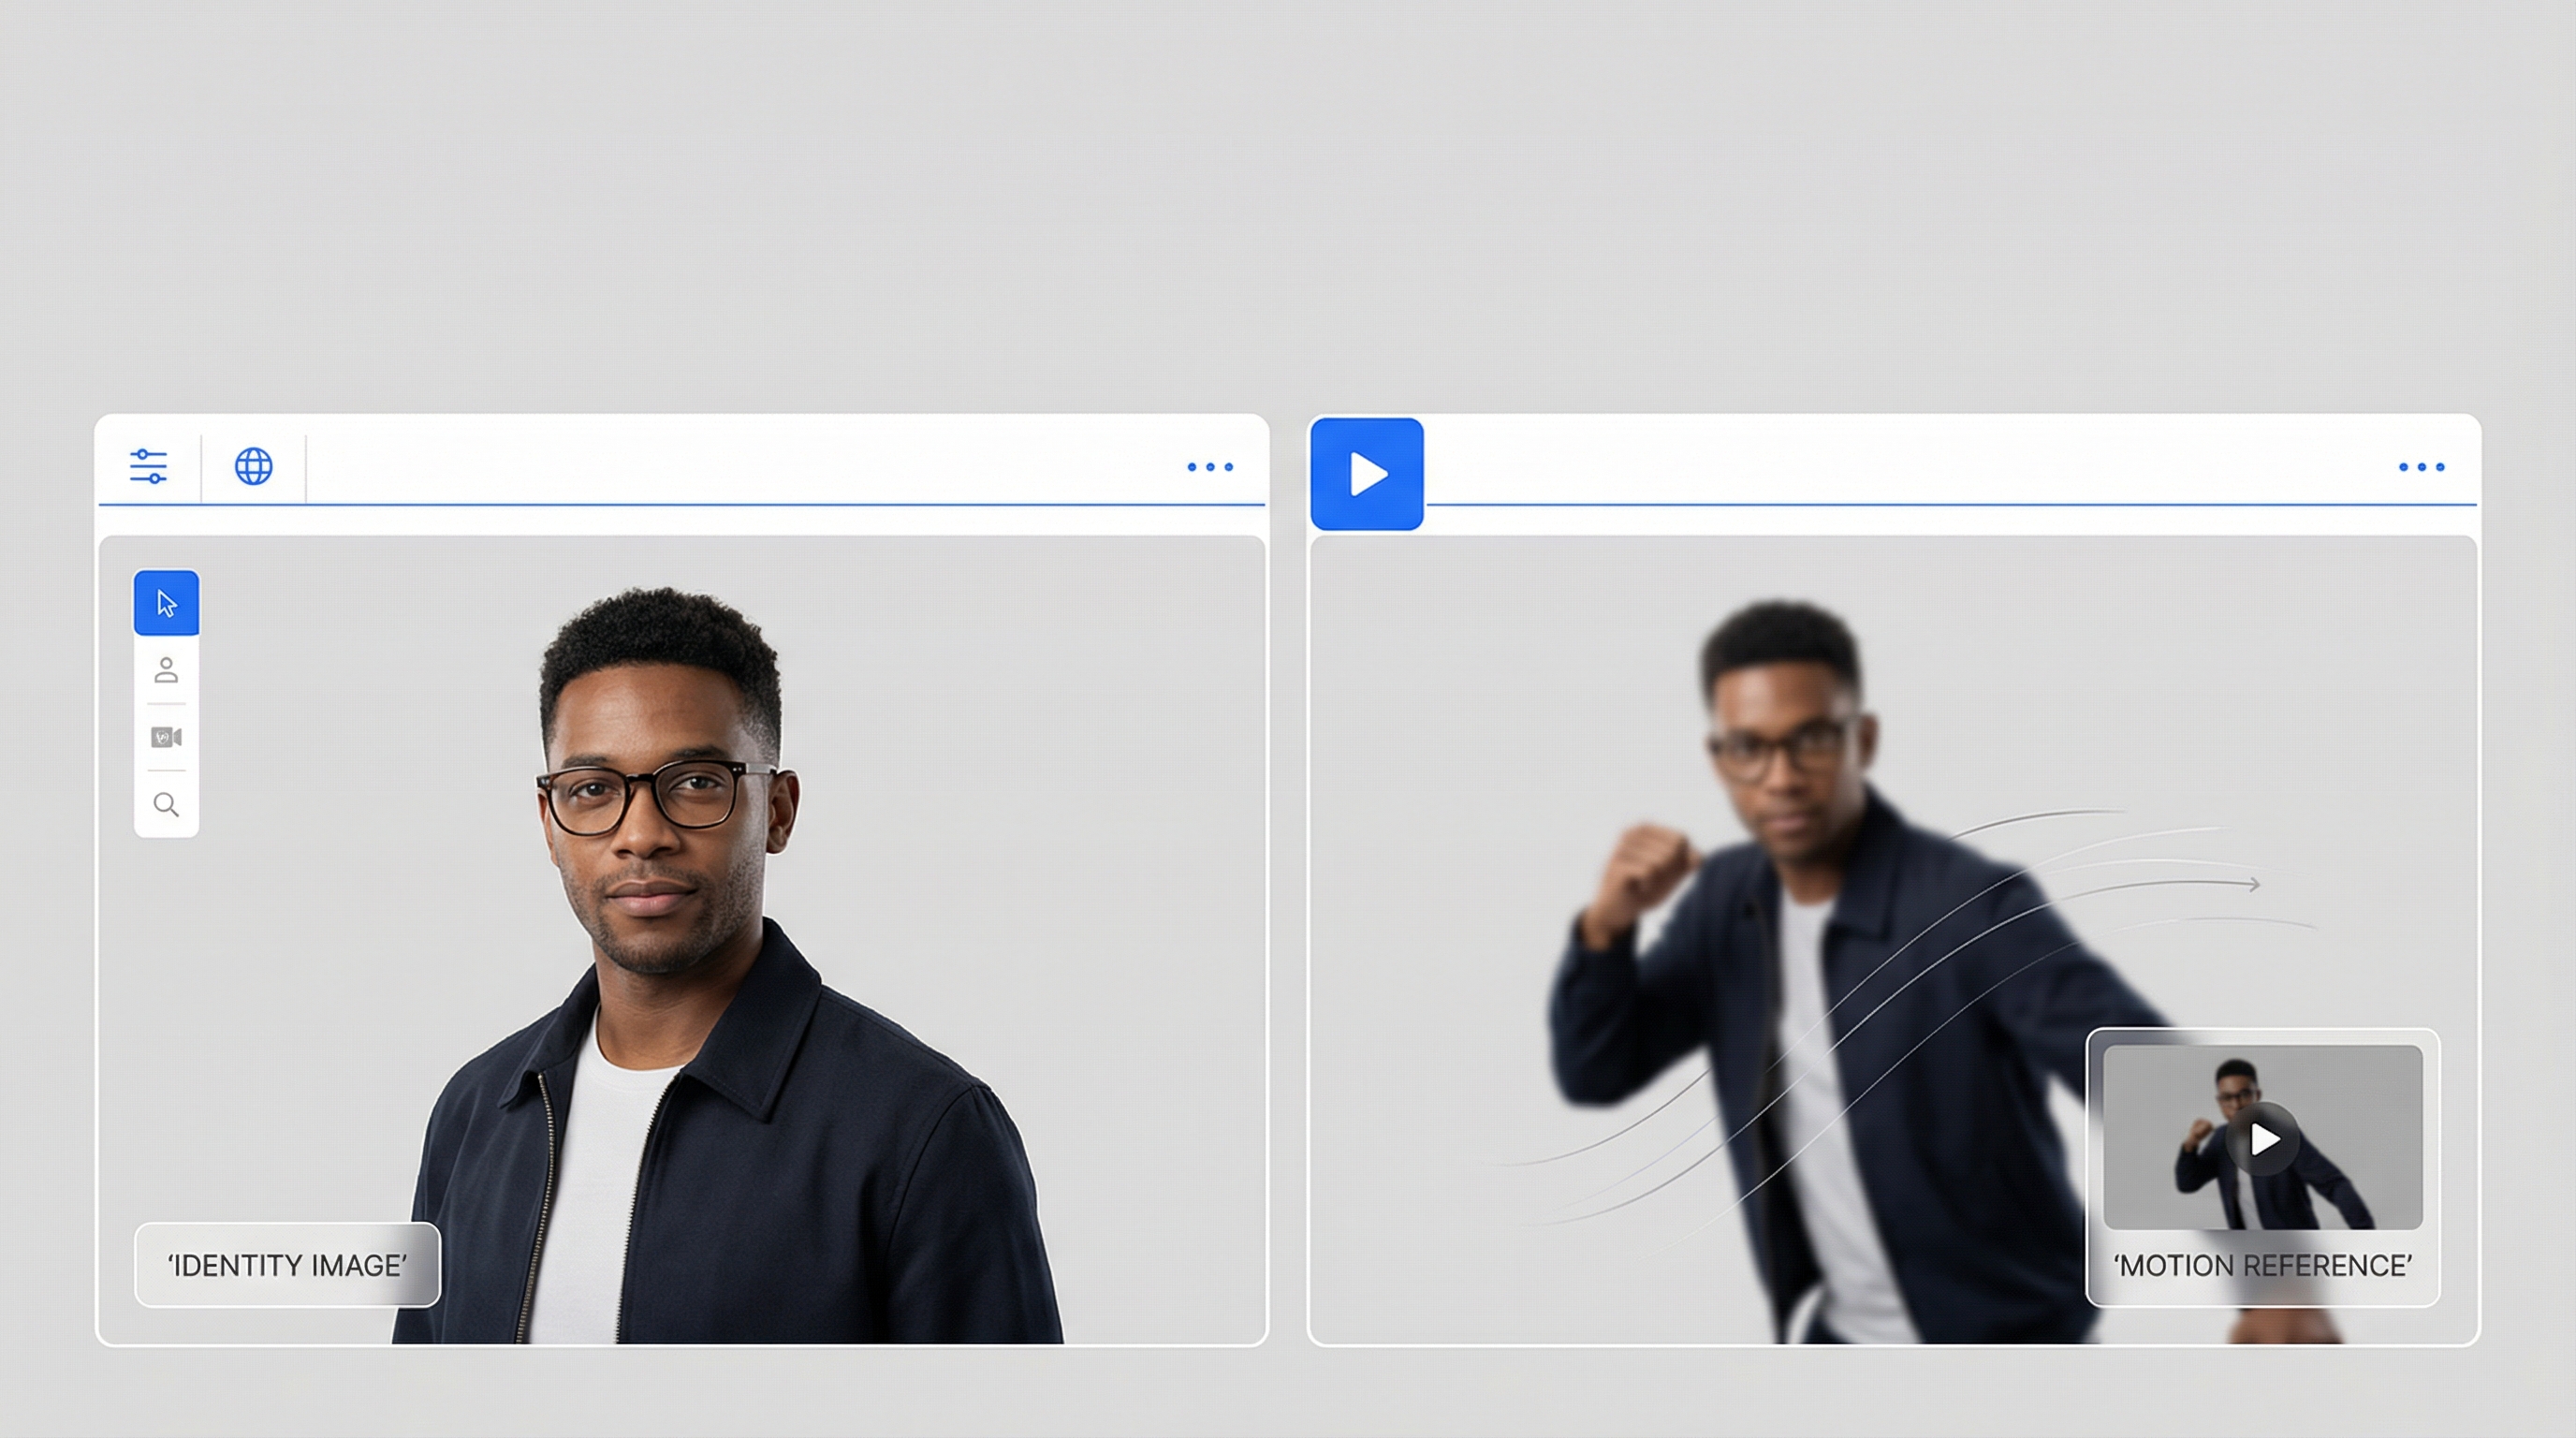
Motion control is basically a two-input recipe:
- A character image (identity: face, outfit, silhouette)
- A motion reference video (movement: gestures, walking, dance timing)
The generator tries to keep the identity stable while following the movement from the reference.
That’s why motion control feels so “creator-coded.” You can build a content series around it:
- same character
- new motion each week
- consistent look
And because the motion is anchored in a real clip, the results can feel more believable—especially for social content.
The two tools: Higgsfield vs Kling (what each is best at)
You’ll see people compare Higgsfield and Kling because they’re often used for similar “image-to-video” goals, but they shine in different ways.
Higgsfield: polished look, professional vibe
When people talk about Higgsfield as an image-to-video option, the vibe is usually clean, cinematic, and production-friendly—great when you care about aesthetics and general video generation.
If you want to explore it as an option on Flux Pro, here’s the platform model page:
- Higgsfield AI (Flux Pro): https://fluxproweb.com/model/higgsfield-ai/
Kling: motion-transfer fidelity (the motion control specialist)
Kling’s motion-control workflow is built around the concept of motion reference. That’s the key difference: it behaves like a motion “mapper,” not just a video generator.
Flux Pro’s Kling page is here:
- Kling Motion Control (Flux Pro): https://fluxproweb.com/model/kling-motion-control/
And in this article we’ll use these keyword-linked mentions exactly as requested:
Why Kling 2.6 is better than Higgsfield for motion control
Let’s say your goal is “make the same character do the same kind of movement reliably.” That’s where Kling 2.6 generally wins.
Here’s the creator-first way to think about it:
1) Motion reference is the main event
With motion control workflows, the biggest variable is how faithfully the model follows the reference clip—timing, posture, gesture rhythm, and overall energy.
Kling 2.6 is designed specifically around that.
2) Identity tends to hold up better under movement
Motion is where a lot of models start to wobble:
- face drifting
- hands melting
- body proportions shifting
Kling’s motion-control focus tends to make it easier to iterate toward a stable result by adjusting the motion reference rather than “prompt wrestling.”
3) Iteration is faster for series creators
If you’re making short-form content, you don’t want a workflow that feels like a science experiment.
Kling’s best advantage is how easy it is to do this loop:
- keep identity image
- swap motion reference
- generate
- pick the best
That loop is the backbone of any scalable motion content pipeline.
The 2-minute prep that prevents 80% of weird artifacts
Here’s the truth: motion control is less about “perfect prompts” and more about matching inputs.
A) Pick the right character image
A good image is:
- clear face (not tiny)
- visible hands (avoid hands in pockets)
- readable silhouette (don’t crop off limbs if your motion is full-body)
- clean lighting (extreme shadows cause flicker)
Rule of thumb: match your framing.
- full-body motion → full-body image
- waist-up motion → waist-up image
- close-up motion → close-up image
B) Pick the right motion reference video
Good motion references are:
- stable camera
- clear subject
- similar angle to your character
- moderate speed
If you want “viral movement,” don’t start with the craziest choreography. Start with something simple you can post as a repeatable format:
- walk toward camera
- wave + smile
- point + react
- small dance groove
Step-by-step workflow on Flux Pro AI
This is the practical workflow you can follow today—and for motion control specifically, I recommend going straight to Kling.
Step 1: Open the model you’ll actually use for motion control
Start here:
That’s the cleanest path when your goal is faithful motion transfer and repeatable results.
Step 2: Upload your identity image
Choose the cleanest identity image you have. If you’re building a series, keep a small “identity library” of 3–5 consistent images of the same character so you can test quickly.
Checklist:
- face is clear and large enough
- hands/arms aren’t heavily hidden
- framing matches your motion reference (full-body ↔ full-body, close-up ↔ close-up)
Step 3: Upload your motion reference video
Match framing and keep the camera stable. The cleaner the motion reference, the less the model has to guess.
Best starter motions:
- walk toward camera
- wave + smile
- point + react
- slow groove dance
Step 4: Use a short prompt for style, not motion
This is the biggest beginner mistake: writing choreography into the prompt.
- Don’t write a paragraph describing movement.
- The motion already comes from your reference video.
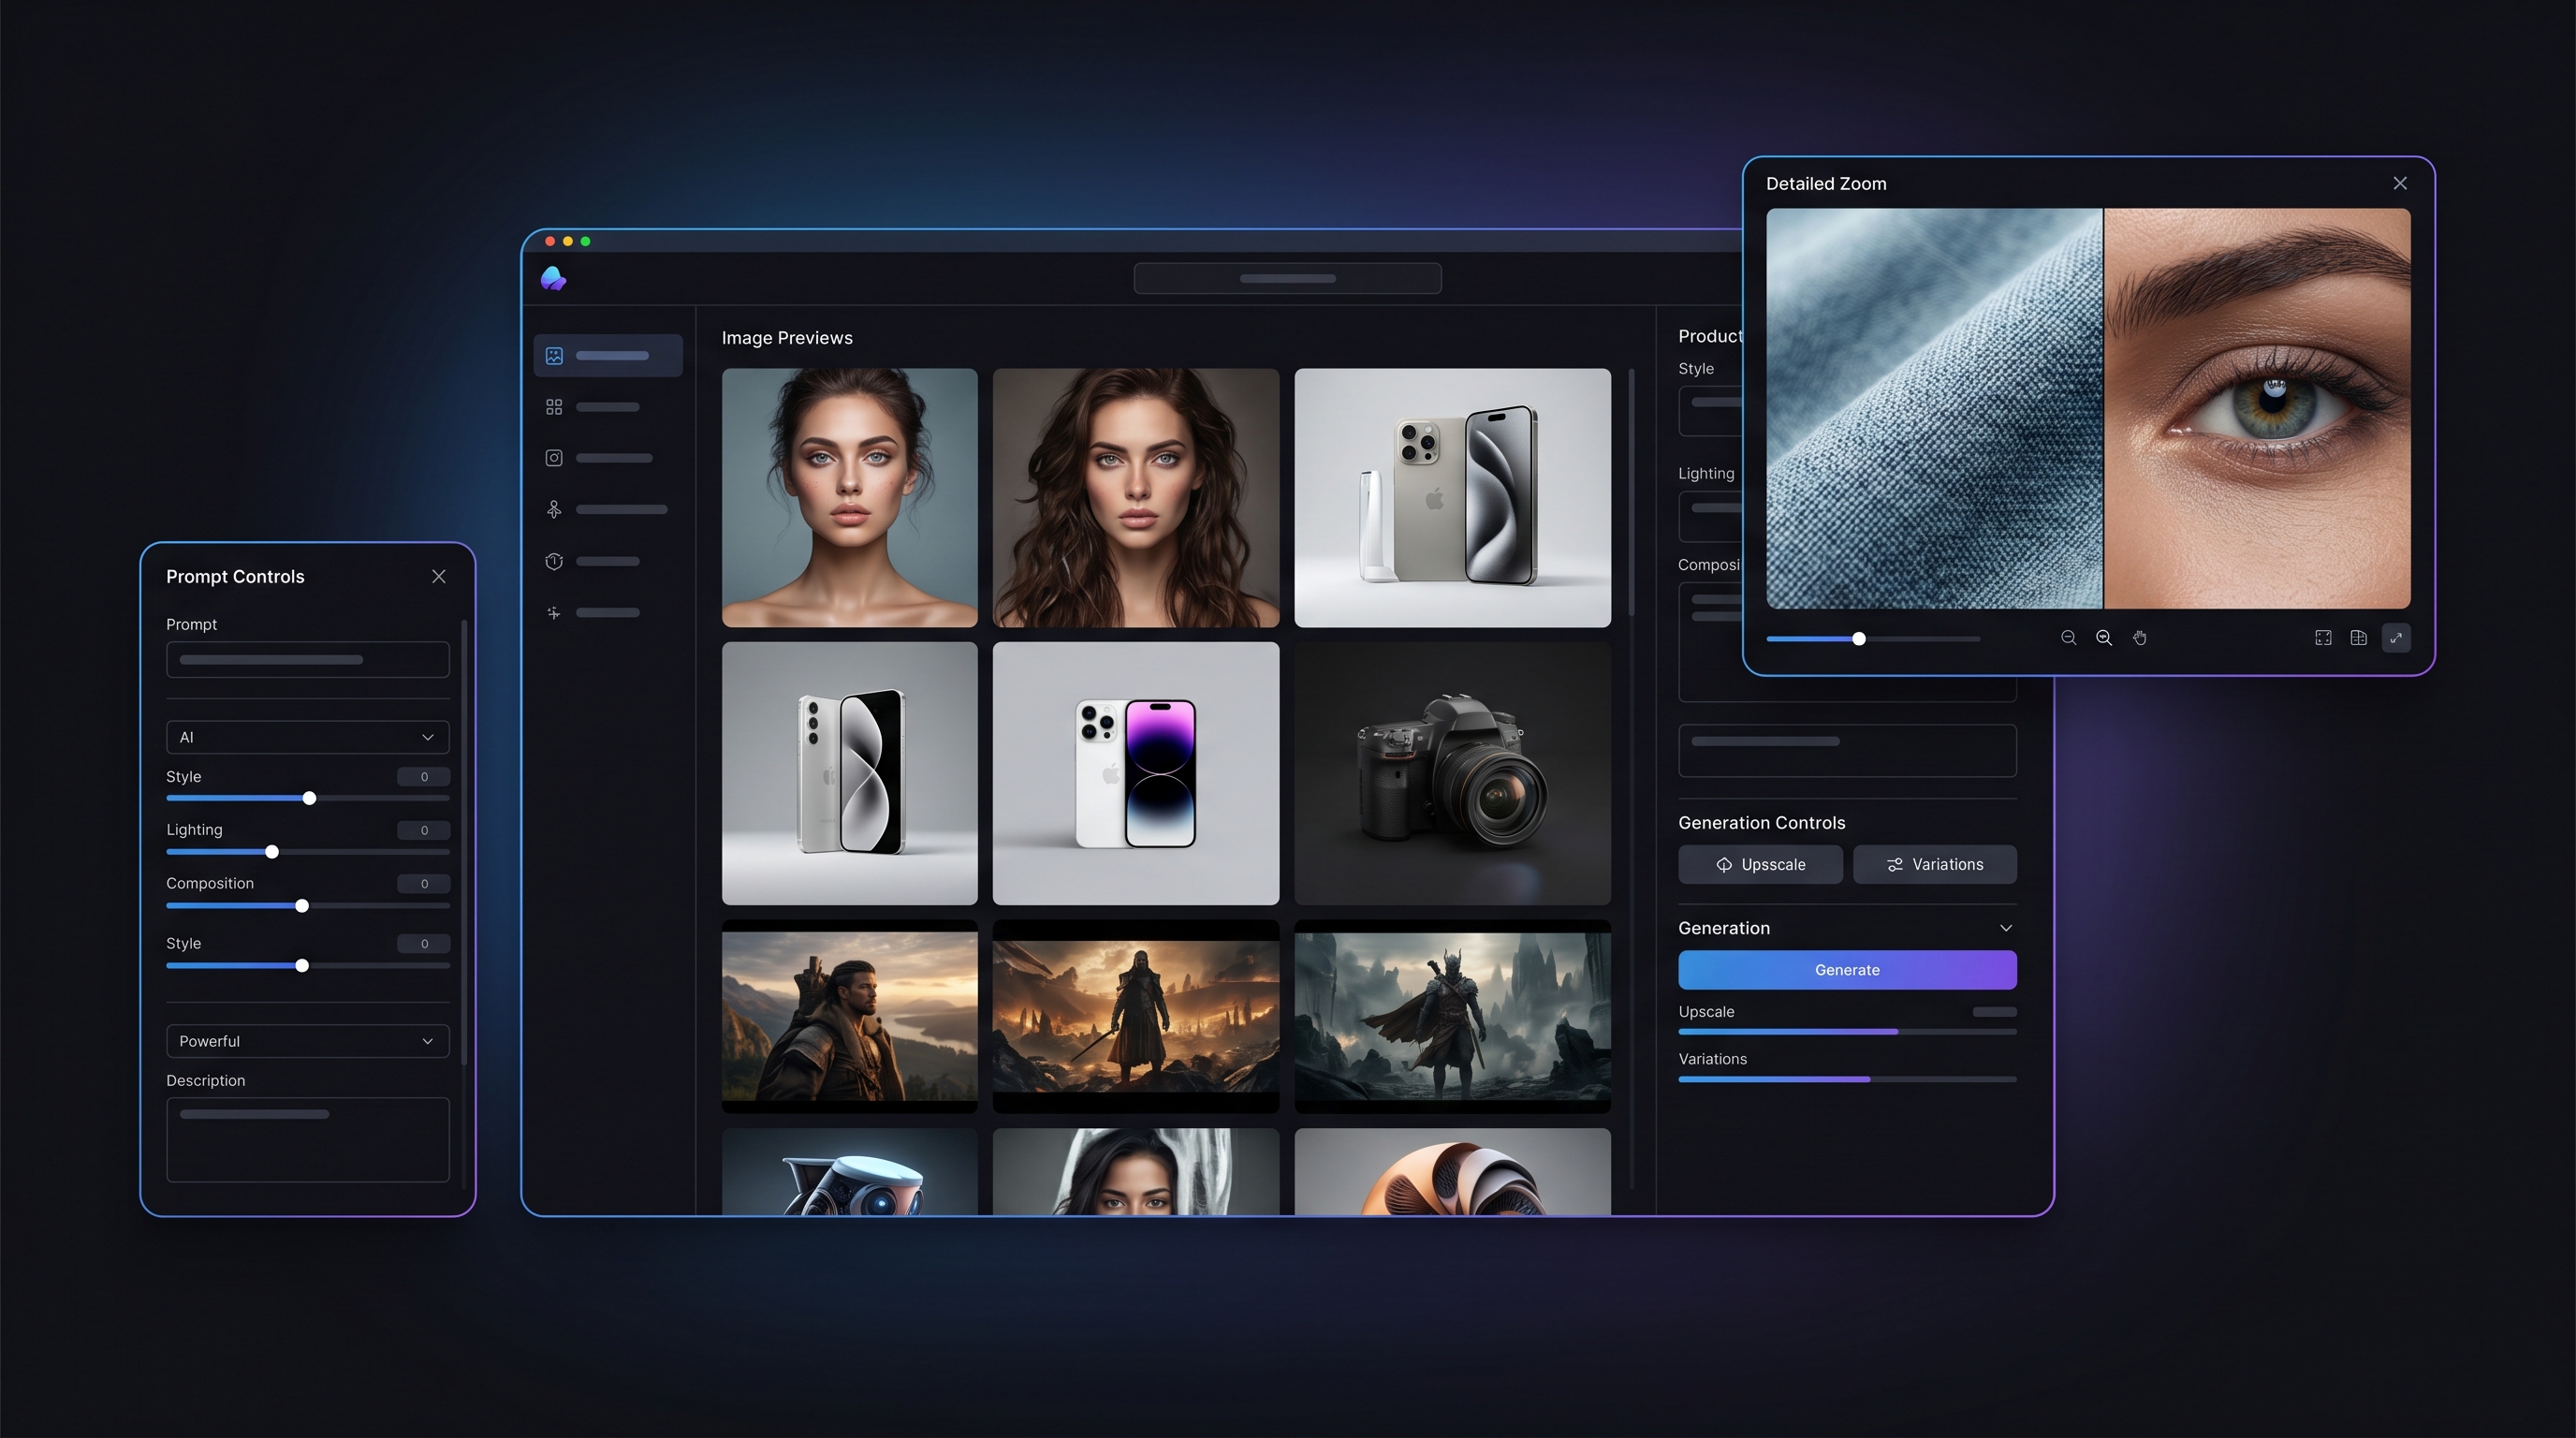
Your prompt should guide:
- lighting
- environment
- realism level
- camera vibe
Copy/paste prompt patterns:
Prompt A (social influencer vibe):
Bright daylight, handheld phone look, street background, natural facial expression, realistic skin texture, clean details.
Prompt B (cinematic vibe):
Cinematic shot, soft key light, shallow depth of field, realistic cloth folds, subtle film grain.
Prompt C (studio vibe):
Studio lighting, clean seamless background, crisp detail, smooth camera movement, sharp focus.
Step 5: Generate and evaluate the right things
When you get your output, check these four areas:
- face stability
- hands and fingers
- feet contact (no sliding)
- background wobble
Step 6: Iterate like a creator (the fast loop)
If something breaks, change the input that controls it:
- face drift → better identity image + calmer head motion reference
- hand artifacts → slower-hand motion reference + less occlusion
- background warping → steadier camera + simpler scene prompt
You’ll usually get a “postable” clip faster by swapping motion references than by rewriting prompts.
How to build “viral-ready” motion formats
Viral doesn’t always mean “big choreography.” It often means repeatable.
Here are three easy formats that scale:
1) Weekly motion series
- Same character
- New motion clip every week
- Same framing
This is the easiest way to build an account identity.
2) Brand-friendly gestures
If you’re making ads or brand content:
- pointing to product
- reacting to text overlays
- holding a prop
- turning to camera
Keep backgrounds clean and motion moderate.
3) Influencer-style short clips
Here’s the keyword-linked mention you requested:
Good influencer-style motions are simple:
- pointing
- nodding
- small dance groove
- “look back and smile”
- casual walk
These create a believable vibe without pushing the model into complex limb gymnastics.
Troubleshooting: the 6 fixes you’ll use constantly
When something goes wrong, it’s almost always one of three things: (1) framing mismatch, (2) motion reference is too chaotic, or (3) the prompt is fighting the reference. Use the fixes below like a checklist.
1) Face drift
What it looks like: the face subtly changes, eyes/jaw shift, or identity “slides” mid-clip.
Try (in this order):
- Upgrade the identity image: sharper, front-ish angle, face larger in frame, clean lighting
- Calm the motion reference: fewer head turns, less blur, steadier camera
- Ground your prompt: keep it short; add one stabilizer line like “consistent face, natural skin texture”
Quick tip: if the motion reference is full-body but the identity image is a close-up (or vice versa), drift becomes much more likely.
2) Hands look weird
What it looks like: melted fingers, flickering palms, strange gestures.
Try:
- Swap to a slower-hand motion reference: pointing, waving slowly, holding poses (avoid clapping/spinning hands first)
- Use an identity image with visible hands/forearms (no pockets, no heavy occlusion)
- Add a simple prompt add-on: “realistic hands, natural proportions”
Quick tip: if you don’t need hands for the shot, stage the motion so hands stay closer to the body.
3) Foot sliding
What it looks like: the character “ice-skates” while walking or feet float above the ground.
Try:
- Use a motion reference with obvious footfalls (clear shoes + visible ground contact)
- Keep the camera stable and the floor visible (busy ground textures can worsen sliding)
- Optional prompt add-on: “grounded stance, clear floor contact”
4) Background warping
What it looks like: walls bend, backgrounds ripple, the scene feels like jelly.
Try:
- Prompt for stability: “clean background” or “studio seamless backdrop”
- Choose steadier motion reference footage (less shake/zoom/pan)
- Reduce background complexity (crowds, text, patterns) until the character is stable
Quick tip: lock the character first on a simple background, then “upgrade” the environment in later passes.
5) Jitter
What it looks like: micro-shaking body, stuttery movement, frame-to-frame popping.
Try:
- Avoid spin-heavy dances and sudden direction changes until you have a stable baseline
- Use higher-quality motion footage (less compression, clearer subject, consistent lighting)
- Keep prompts short—long, style-heavy prompts can increase jitter
6) Looks too “AI”
What it looks like: plastic skin, uncanny expressions, over-stylized lighting.
Try:
- “natural lighting, realistic textures, subtle detail”
- Use fewer style adjectives (pick one vibe: social or cinematic or studio)
- Simplify backgrounds until the character is stable, then add complexity gradually
Quick tip: “phone-video daylight” prompts often look more believable than dramatic neon lighting for short-form content.
What “Unlimited” usually means (and how to read it correctly)
You’ll see the phrase:
In most creator platforms, “unlimited” typically means plan-level access to the feature (rather than “a tiny daily cap”), but it may still be governed by usage rules depending on the platform.
The practical takeaway:
- If you’re rendering a lot of clips, choose a plan that matches your volume.
- If you’re experimenting, start small and scale up once your workflow is stable.
Why I recommend doing this on Flux Pro AI
Motion control gets frustrating when your workflow is scattered across multiple tools.
Flux Pro AI makes life easier because you can:
- access your motion-control model in one place
- keep your identity image and motion references organized
- iterate faster without switching platforms
And if you want the simplest “do it now” path, follow this next:
Start with a walk or a wave, lock identity stability, then scale into more energetic motion.
Quick FAQ
What motion videos work best?
Steady camera, clear subject, readable limbs, moderate speed.
Can I do talking/lip movement?
Yes, but start with gentle motion and close-up framing. Extreme head turns increase drift.
How do I keep the same character across multiple clips?
Reuse the same identity image (or a small set of consistent images) and keep framing consistent.
What’s the ideal prompt length?
Short. Style guidance beats storytelling in motion control.
What’s the easiest viral format to start with?
A simple walk toward camera, wave, or point-and-smile clip in bright daylight.